The following patches are about understanding how messages flow through patchcords, enter inlets and exit outlets. Knowing how messages flow through your patch when programming in Max is comparable to knowing the rules of driving when steering on the road. In order to find out the underlying rules of Max we will first get to know the button – probably one of the most used max objects. Afterwards, we will trigger several actions with just one button click and have a look, in which order they will be processed.
Let’s start with an empty patch and add a button. You can do so by double-clicking and selecting the button or by pressing b on the keyboard.
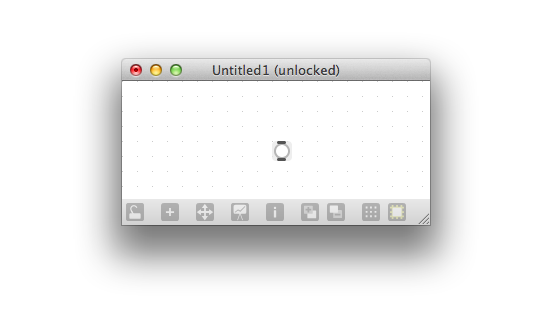 In order to find out what a button does, we open the help patch of the button. Every max object comes with such a help file. Often, help patches provide a working example which you might want to copy+paste and adapt for your own purposes. Make sure, you never change and then save a help file. We open the help file by selecting the object and pressing shift+cmd+H or by right-clicking on the object and selecting Open button Help (the first option). Opening the help patch of the button, the following window opens:
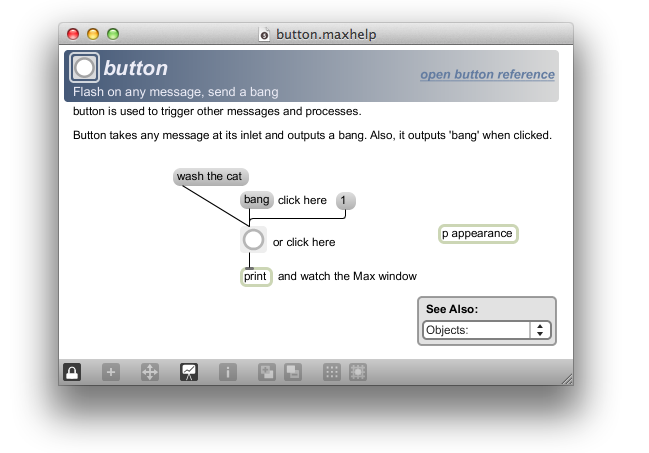
Try out the patch from the help. You will see that the button outputs the message “bang” whenever it is clicked or receives any message via its inlet. The bang is a very special message in Max which means something like “do it!” or, to quote the max tutorials: “do that thing you do”. We can think of using the button a bit like pushing a domino stone which then will cause a lot of other stones to fall as well – some kind of trigger. Additionally, the button gives clear visual feedback and flashes whenever it receives a message or is clicked.
In order to get acquainted with the use of the button, realize the differences between the following three setups. Try to predict output before reading further. It is important that inlets as well as outlets can have multiple connections. For example, one button can be connected to several other buttons.
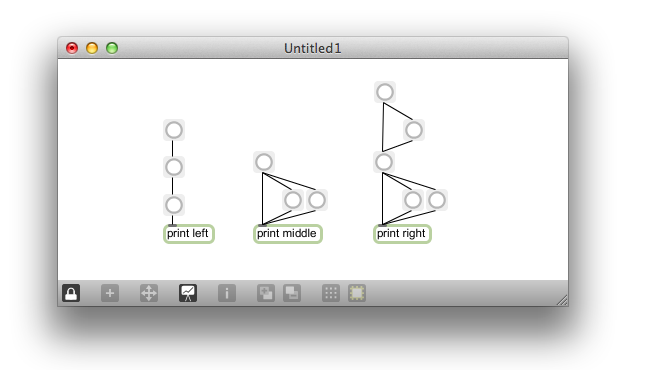
Have a look at the Max Window:
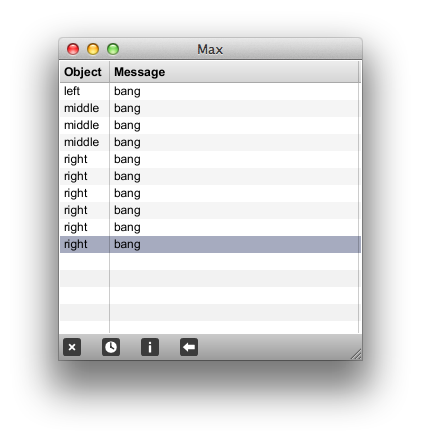
In the left example, the button click causes a bang, which reaches the second button and causes the second button to send a bang which then reaches the third button and causes it to send one final bang to the print object (thinking of domino stones again). In the middle and right example, the initial bang is send to more than one object and consequently causes more than one bang as an output. (Note, that the print objects have an argument which allows us to identify them when using several print objects.) Unfortunately, we can only see that the bang reaches several objects but we can’t see the order in which they arrive. One way to change that is by triggering different messages with one click. That way, we can see which one is printed first in the max window and so determine the order in which Max sends messages.
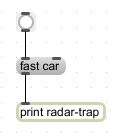
Build the following little patch in which a button click will causes the output “fast car” in the Max Window:
The click on the button causes the output “bang” (lock your patcher first!). This bang reaches our message box and tells the message box “do that thing you do”. The message box obeys and consequently passes on “fast car” which travels from its outlet to the inlet of the print object. We have used a button to trigger our custom message. Now let’s add another message:
 If we now click the button, both message boxes receive a bang and will then send their message to the print object. But which one is printed first? To many’s surprise, the slow car receives its destination first. That’s because one of the crucial rules of MAX is that order is depending on the spatial arrangement of the objects and messages are sent in right-to-left order.
As this is really crucial but unintuitive for many, let’s also illustrate it with another patch:
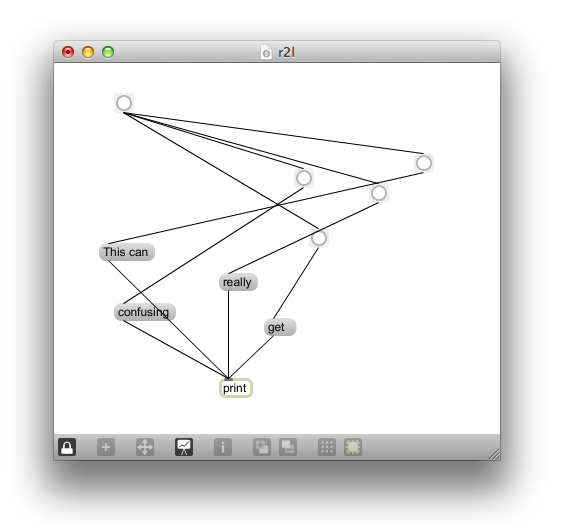
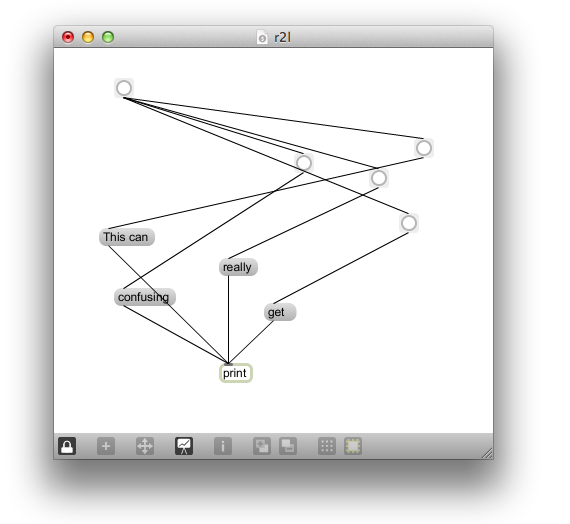
And in order to illustrate that it can get really confusing even when knowing the rules, two more patches.
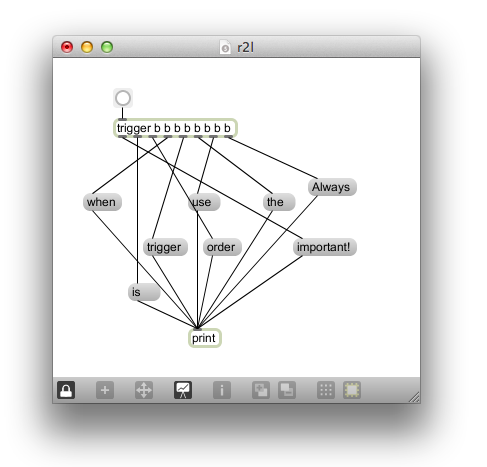
The first will cause the output “This can really get confusing” in the max window, the other one will have the order “This can get really confusing”. As both is clearly true, we’ll have to do something about that. It’s too dangerous if moving one object around causes a different behavior. As a last object in this exercise I want to introduce the trigger object. Add the trigger object to the last chaotic patch. You can do so by double-clicking and selecting an object box and writing “trigger” (or just “t”) inside it or by pressing t (t like trigger). Then, open the tigger help (we open the help file by selecting the object and pressing shift+cmd+H or by right-clicking on the object and selecting Open button Help):
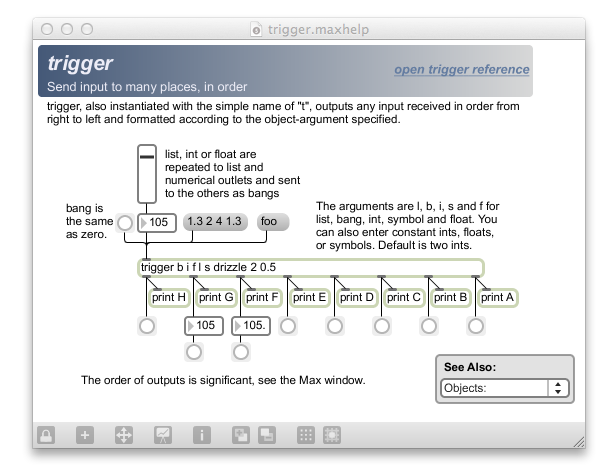 This looks complicated. For now, all you need to know is that the trigger is used to send one input to many places, but in a clear order. Consequently, we can use it to send one bang to many messages – in order !
The trigger outputs the received bang eight times, starting from the right outlet and progressing to the left. Although we can achieve the same output without the trigger, we make it our rule, to always use the trigger object whenever order is an issue! That way you make sure your output is still the same after you move objects around. Moving objects around is something you will do all the time, for example to save space or to make it clearer or more visually pleasing. It would be a shame, if that would break the intended behavior of your patch.
As a last remark: some of the patches in this exercise aren’t really good examples – however, they are realistic! In the future, we will avoid such messy looking patches and use more comments.
The End.
What you should be able to do by now:
- Use a bang to trigger messages (and for example, print them in the max window)
- Use the help patches of objects, copy+paste parts into your own patch
- Send several messages with one click in a clear defined order
- Use the trigger object to send one input to many objects in a clear defined order
What you should know by now:
Bang: The bang message is a very powerful and special message which tells objects to perform their task. A bang can for example be used to trigger messages but it can also trigger other objects and cause them to do their specific action. The bang is send by a button. A button is added by double-clicking and selecting the button or by pressing b (b like button).
Help patch: every max object comes with an help patch. This help patch is useful, as it contains a working example of using the object and some explanatory text. You can use the help patch to copy+paste working examples and adapt them for your own purposes. You open the help file by selecting the object and pressing shift+cmd+H or by right-clicking on the object and selecting Open button Help. Make sure, you never change and then save a help file.
Connections: Inlets and outlets can have multiple connections. These connections output their messages in a predictable order. For example, a bang can be connected to several messages. They will be printed from right to left.
Order: Order is very important in Max. This will be come back in further exercises. Know, that the spatial organization of the objects in the patcher matters: messages are sent in right-to-left order when a single object is connected to many other objects. Because we want to avoid that a patch behave differently, depending on where its objects are placed, we use the trigger object whenever order is an issue.
Trigger: the trigger can be used to send one input to many places, but in a clear order, progressing from the right to the left outlet.
Arguments: Some objects, for example the print object, can be assigned an argument. An argument to the print object allows one to identify the source of messages printed to the Max window.
