Encapsulation
The concept of encapsulation comes in two forms: (1) in the form of subpatches and (2) in the form of abstractions.
Subpatches
Encapsulation allows us to place parts of our patch in a subpatch. A subpatch is like having a patch inside a patch. A bit like matryoshka or babushka dolls. You create a subpatch by typing pd into an empty object and giving it a name as an argument. For example [pd myFirstSubpatch].
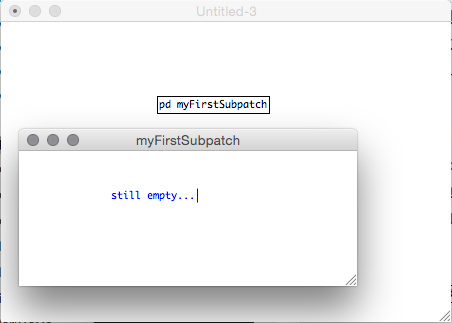
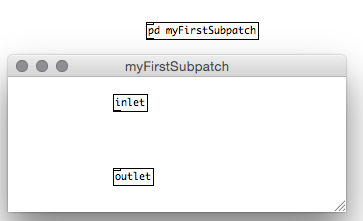
If we click on this object in play mode, a new empty patch opens in which we can place objects and connect them just like in our main patch. The special thing is that this patch is placed within our main patch. In order for it to communicate with the main patch, we can add inlets and outlets to the subpatch. Inside the subpatch, we add [inlet] and [outlet].
If we connect both, we have a subpatch that simply sends messages through.
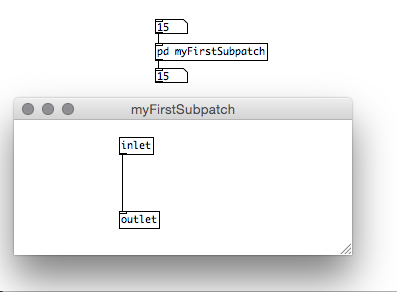
Of course, this does not make much sense yet. But we can do more inside a subpatch. Basically, we can do everything we can do in our main patch. Putting parts of our main patch into subpatches allows us to hide parts of the patch we do not need to see.
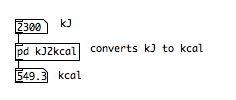
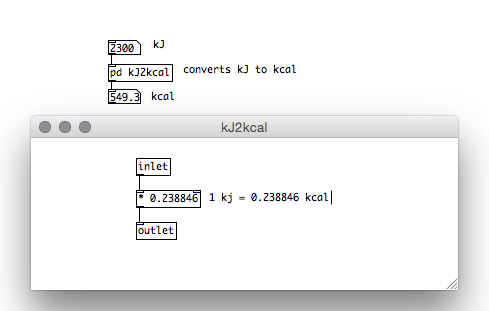
Example: kJ (kilojoule) to kcal (kilocalorie) converter:
We know that 1 kJ = 0.238846 kcal. If we know that a BigMac has 2300 kJ, we can easily find out how many kcals it has:
While this subpatch is relatively simply, they become especially useful, if they become more complex.
Example: Flasher
Let’s go back to the metronome we built in lecture 1.
The patch includes a calculation: the beats per minute (bpm) are converted into milliseconds (ms) because the [metro] object uses ms as its argument. We can put the calculation into a subpatch to make the patch more clear. Let’s make a subpatch that acts like a metro object but takes BPM instead of ms.

Abstractions
Abstractions are also a form of encapsulation. They take the idea of putting some functionality into a subpatch one step further. An abstraction gives us the possibility to have something like a subpatch in a separate, reusable file. Once saved as a separate file, abstractions can be loaded in any Pd patch you build just like the built in objects. Let’s build an abstraction which acts like the metro object but that works with BPM instead of ms.
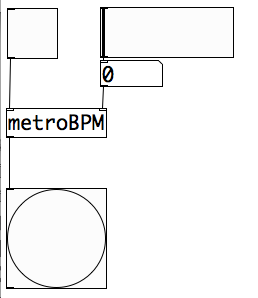
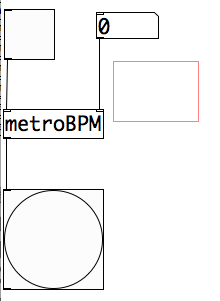
We make a new patch that contains the same information as the subpatch just now:
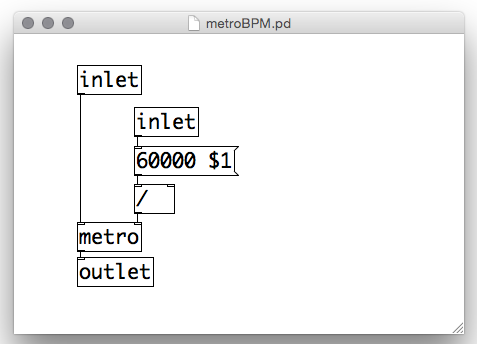
The only difference is that we save this patch as metroBPM.pd. Now, we can use this new metro object just like the any other Pd object.
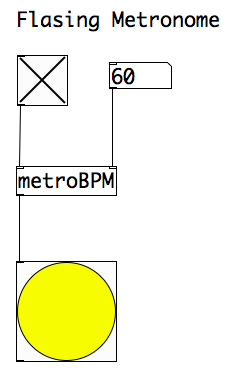
We can for example use it in the metronome like this:
Save this as metronome.pd for later.
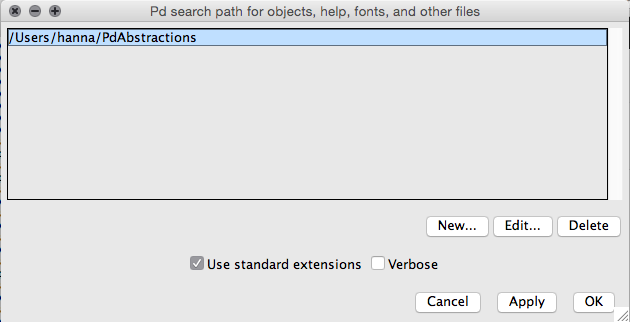
Notice that we do no longer have to put “pd” infront of the name. We can use the abstraction just like built-in Pd objects. The only thing we have to make sure is that Pd knows where to look for our abstractions so that it can find them. Pd can always find an abstraction if it is saved in the same folder as the patch that is using them. However, this is not useful if you use the same abstraction in a lot of patches. Therfor, we can tell Pd where to look for abstractions: Menubar–>Pd–>Preferences–>Path.
Sharing code
If you look around on the Internet, you will find an active Pd community. Often, code is shared. Besides just uploading patches, there are two more common ways to share code:
1. Have a look at this example:
Taken from: http://forum.pdpatchrepo.info/topic/2043/assigning-variables-to-selfmade-objects-behind-the-object-name/2
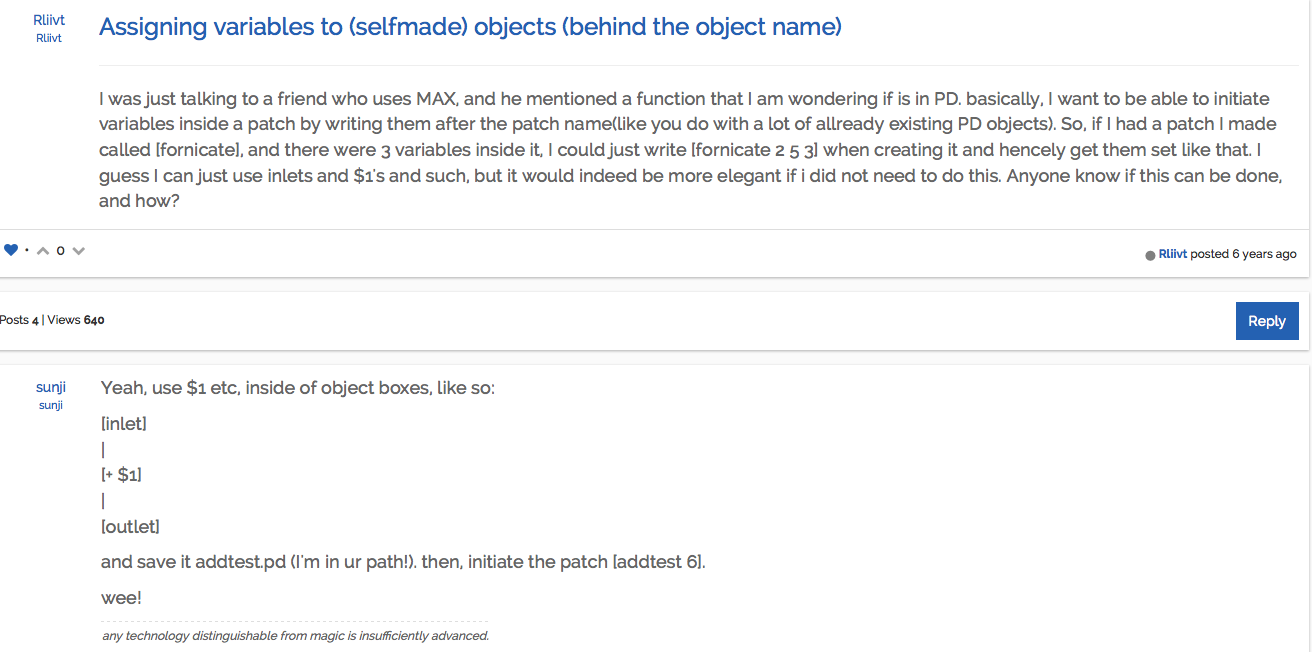
The solution is sketched out using plain text or something that looks a bit like ASCII art. Objects are simple written like this: [objectname], they are connected via lines. Try figuring out what is meant here:
[hello world (
|
[print]
Note the differences between messages and objects.
2. Another way
Another way to share code is by sharing the code behind the patch. If you open a patch with a text editor, you will see something like this:
#N canvas 29 139 557 344 24;
#X obj 113 164 print;
#X text 220 141 prints the messages it receives to the Pd window;
#X msg 113 55 Hello world!;
#X connect 2 0 0 0;
If you share this text with someone and the person saves it with the extension “pd” (e.g., helloworld.pd) she/he can open it with Pd. If you save the above text as “someName.pd”, you will find that it is, in fact, a Pd patch. Instead of uploading a patch, I might post the contents like I did above.
Graph on Parent
Graph on parent is a concept that relates to making GUIs. We have already learned about subpatches and abstractions that help us to clean up messy patches and bundle related processes. The graph on parent concept gives more power to those abstractions and subpatches. It basically allows us to add interface components to our subpatches and abstractions. This has advantages both when using the patch as well as when programming. On the one hand, our patches become even more user friendly. On the other hand, we can use abstractions/subpatches also when we are dealing with GUI objects, which means even less copy pasting the same stuff over and over. This sounds very abstract. Let’s try it out:
Example: Metronome
Consider the metronome example again. Let’s imagine we want to do something like the composer György Ligeti:
We also want 100 metronomes that all can be adjusted to individual speeds.
We can use our “metronome.pd” patch as an abstraction inside a bigger patch and include it 100 times.
However, this looks like this:
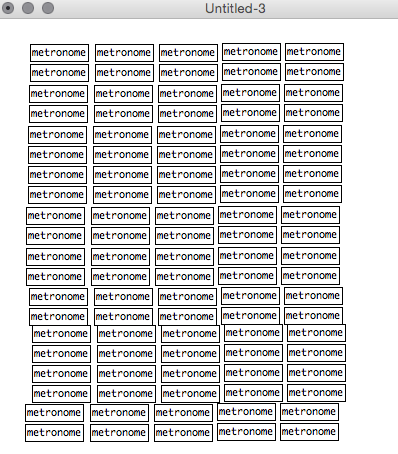
Each of them contains our metronome-patch. However, we do not want to open them one by one to control them. Like with the real metronomes, we want all of our metronomes to each have a slider to adjust the speed. This slider, together with the rest of the interaction-objects should be also displayed.
To do so, we open the metronome.pd. Now we make changes.
1. Add a slider to adjust the speed in a nice way:
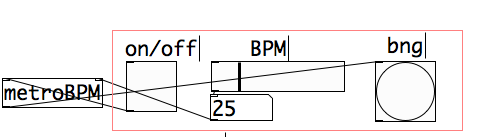
2. We right click on an empty spot in the metronome patch and then select Graph-on-parent:
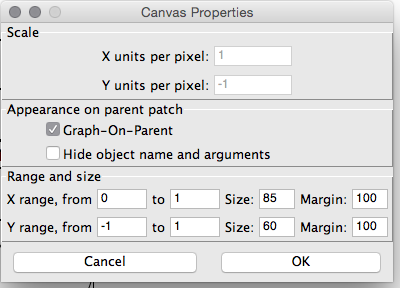
After we click OK, there is a red rectangle in our patch:
3. Now we decide which objects are needed for the user of this object: all objects besides the [metroBPM] are relevant. We will have to place all GUI objects that we want to display to the user in this rectangle. To do so, we make it bigger. (Right click on empty spot and choose Properties again).

Then we rearrange the patch so that all interface objects are in the rectangle.
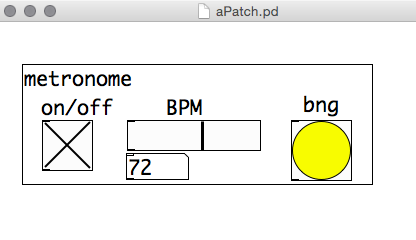
Now, if we include the [metronome] object in our patch, it will look like this:
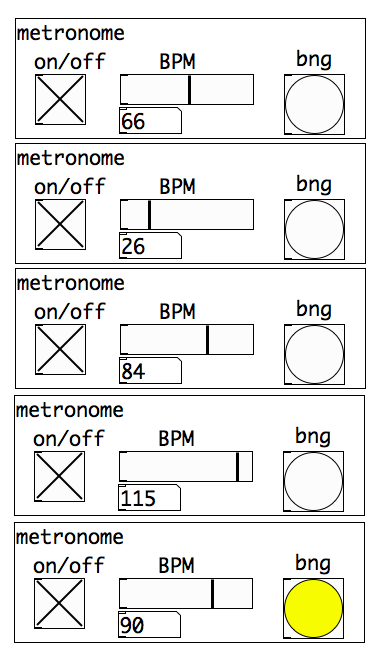
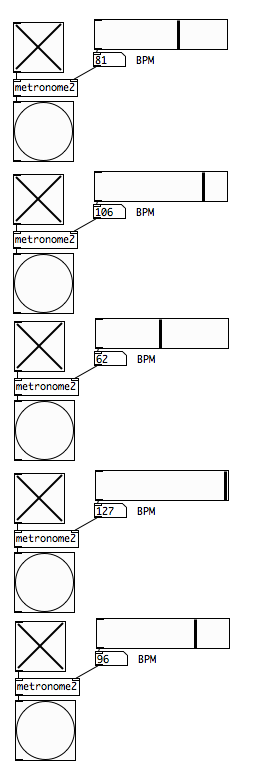
And we can make 100 (or, let’s say, 5) of them easily:
The advantages are:
1) The user only sees what is relevant for him/her.
2) We do not have to work with inlets and outlets for those controls. The GUI objects are part of the abstraction, not part of the main patch. If this was not possible, we would have something that looks like this:
Now, imagine, what happens if you would like to change the color of all buttons….